Set Up Propper for Salesforce
This guide is for Salesforce administrators. It covers installing the package, connecting your org to Propper, assigning access, and creating your first Send Configuration.
Prerequisites
- A Salesforce org where you have System Administrator access.
- A Propper account with an active subscription. Signing requires Propper Sign; document generation requires Propper Gen. You can create an account at app.propper.ai.
- A modern browser.
Install the package
How you install depends on which package you are running. During the beta, most customers use the beta path below; the official AppExchange package is the path once Propper for Salesforce is generally available. Both are covered here so the page stays accurate through general availability.
Whichever path you use, choose Install for Admins Only for the initial setup; you can extend access to more users once setup is complete. Everything after this section (the Setup Wizard, permission sets, and the connection) is the same for both.
If you are running the beta
Propper for Salesforce is currently in beta and is not yet listed on the Salesforce AppExchange, so you install it from a direct package link rather than from the listing.
Get the current install link from the Propper for Salesforce beta page, which always points at the latest beta build.
The beta package installs into sandbox, Developer Edition, and scratch orgs only, not production.
If you are running the official package
Once Propper for Salesforce is generally available, it installs as a managed package from its Salesforce AppExchange listing, including into production orgs. Open the listing, follow the standard managed-package install flow, and continue with the Setup Wizard below.
The AppExchange listing is not published yet, so until it is, use the beta path above.
Run the Setup Wizard
After installing, open the App Launcher and search for Propper Setup to launch the Setup Wizard. The wizard is the fastest path to a working configuration, and it shows what is complete and what remains at each step.
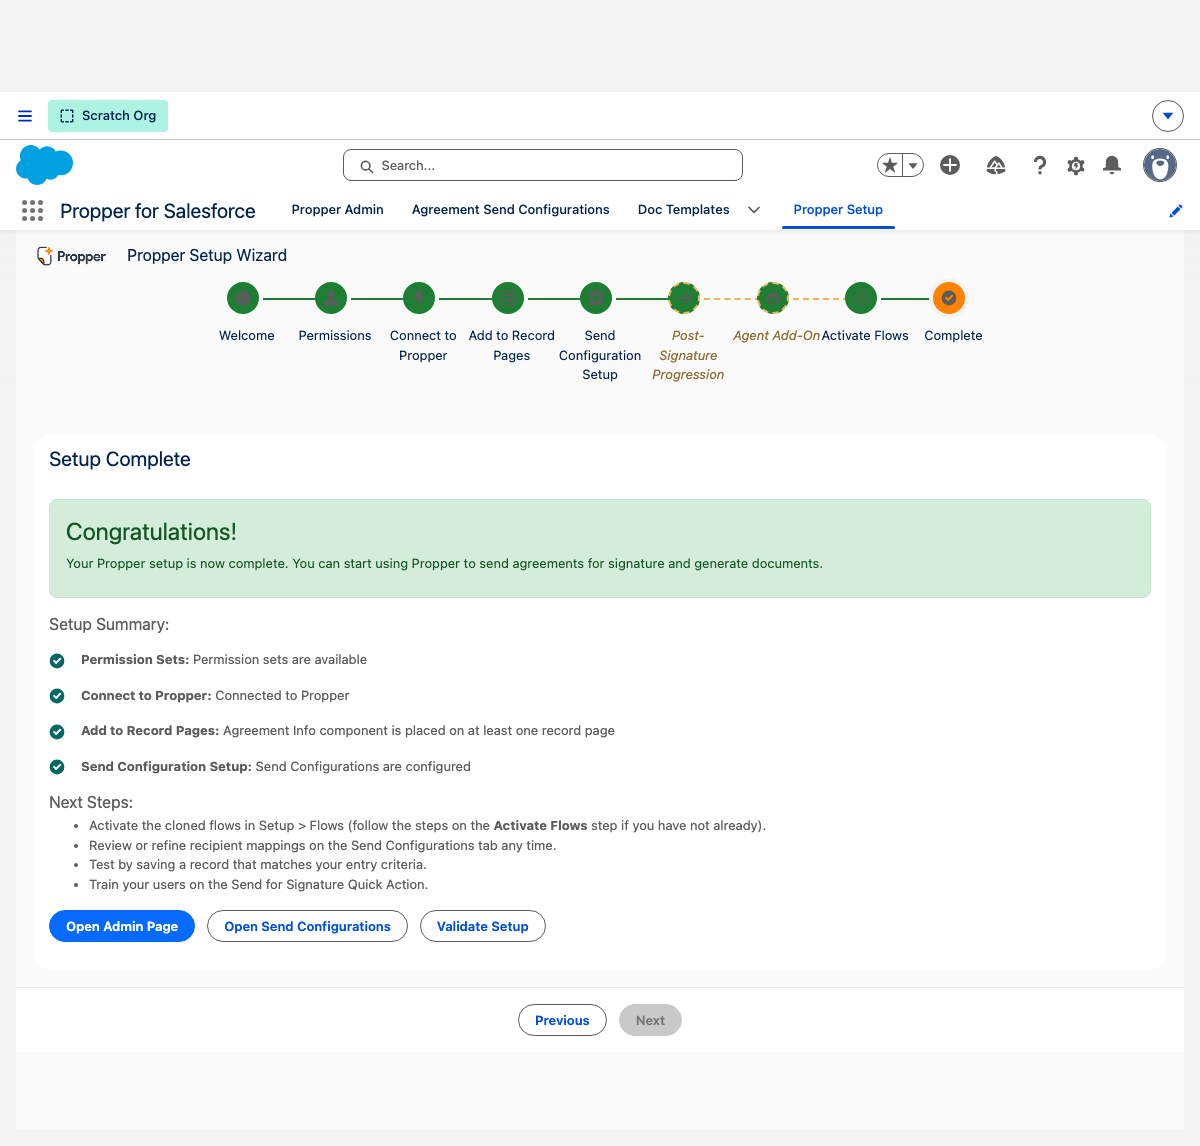
The wizard walks you through nine steps.
1. Welcome. An overview of what you will configure.
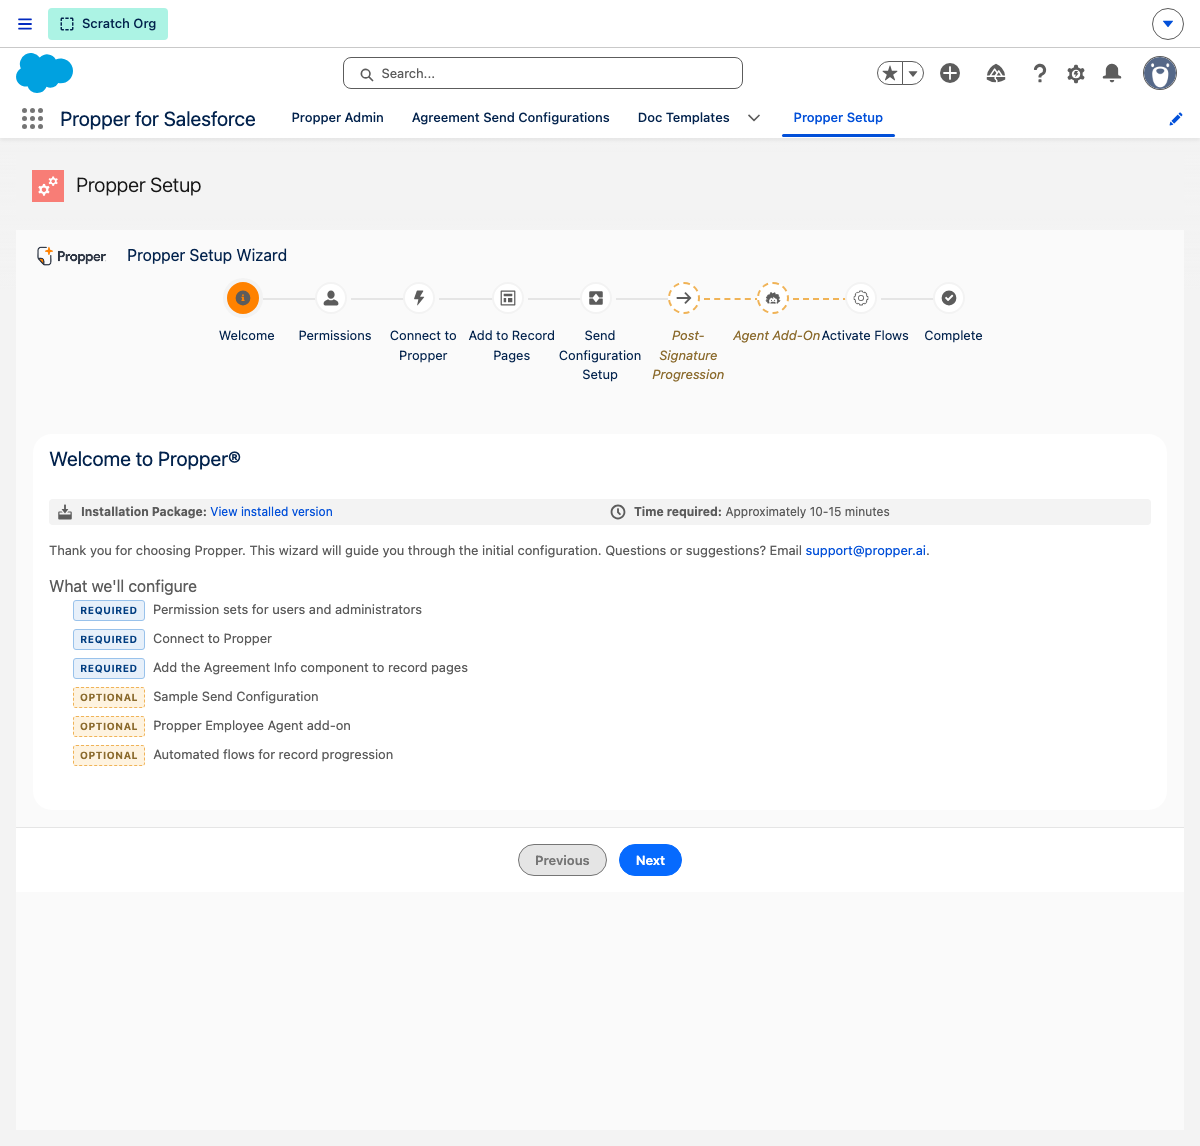
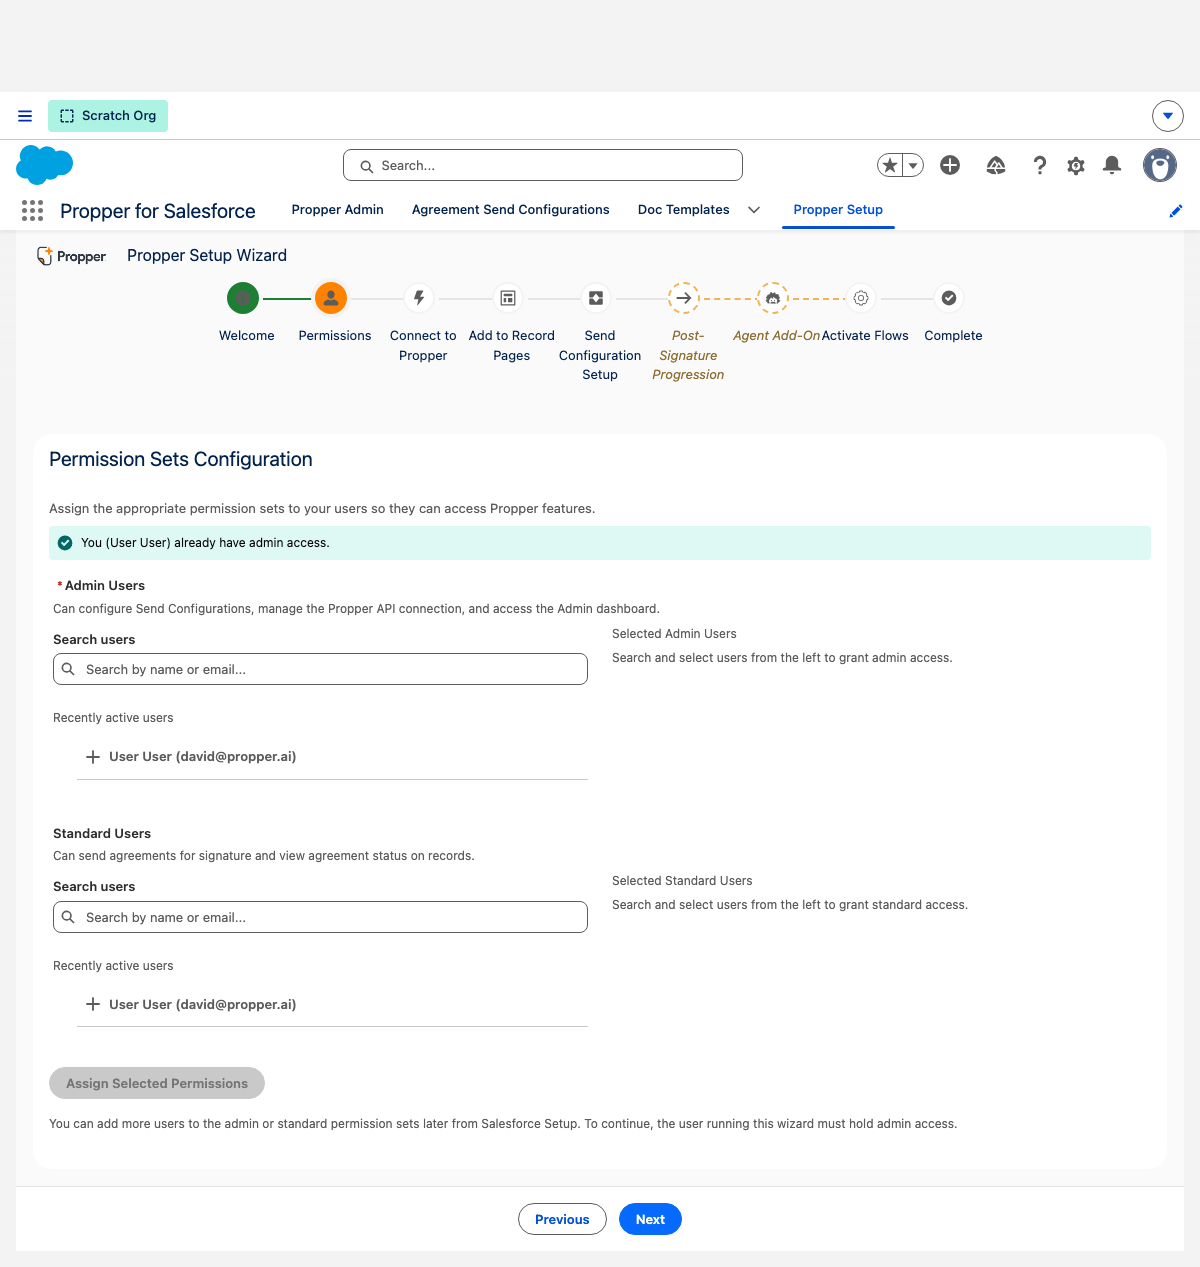
2. Permissions. Assign the Propper permission sets to administrators and standard users.
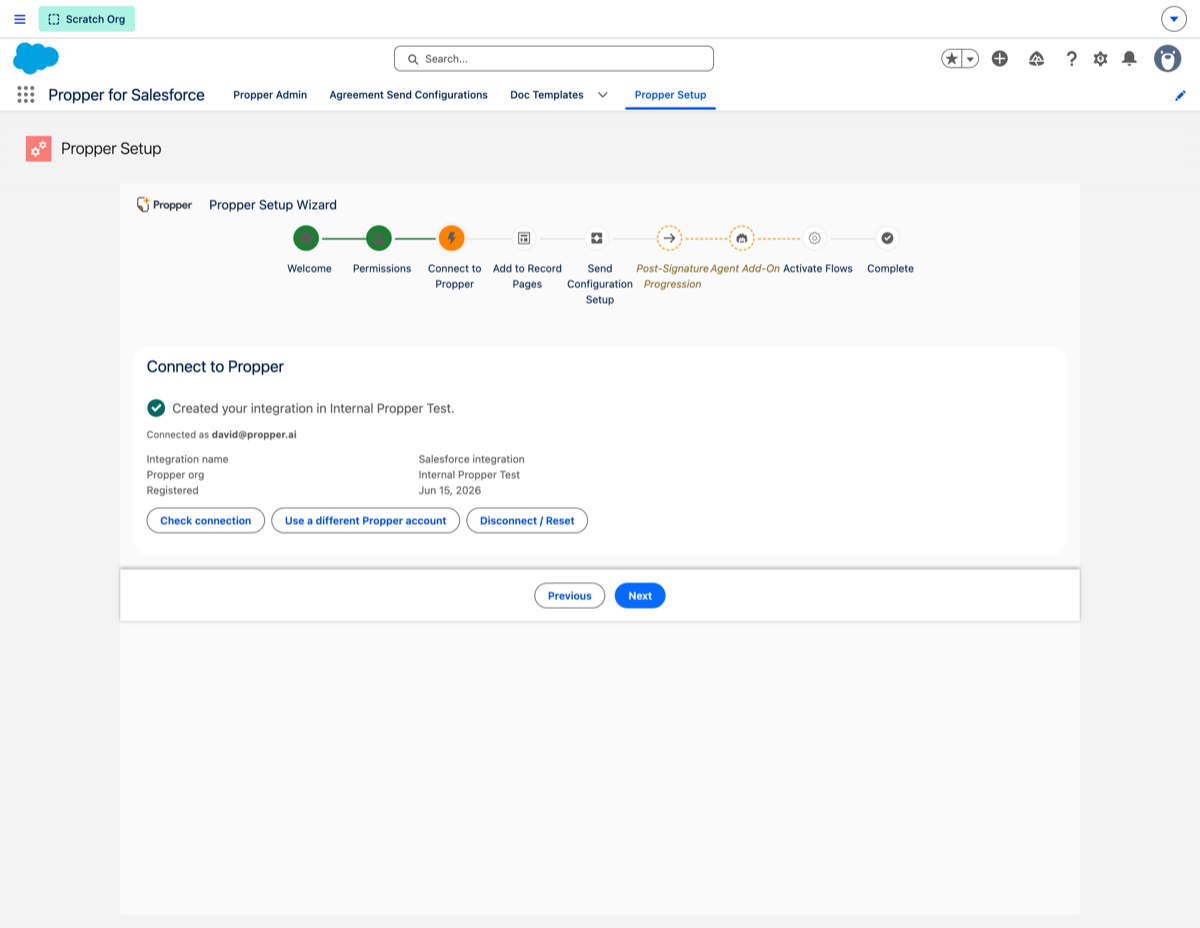
3. Connect to Propper. Authorize the connection with OAuth. There are no API keys to generate or paste.
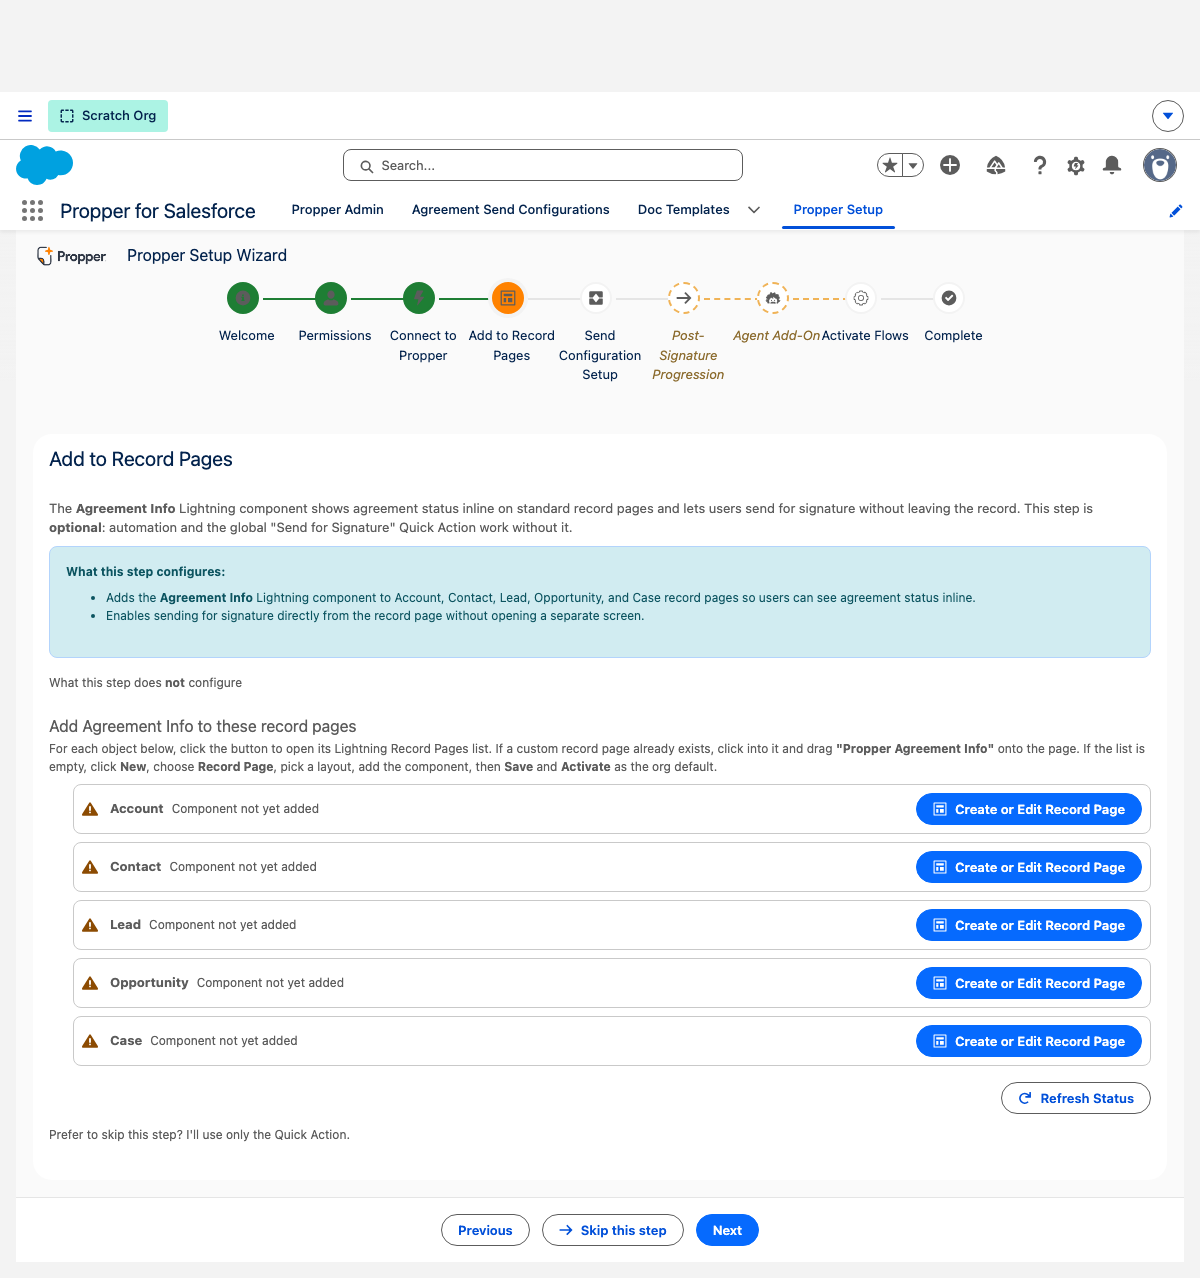
4. Add to record pages. Add the Propper components and actions to the record pages where your team works. A Quick Action is also available.
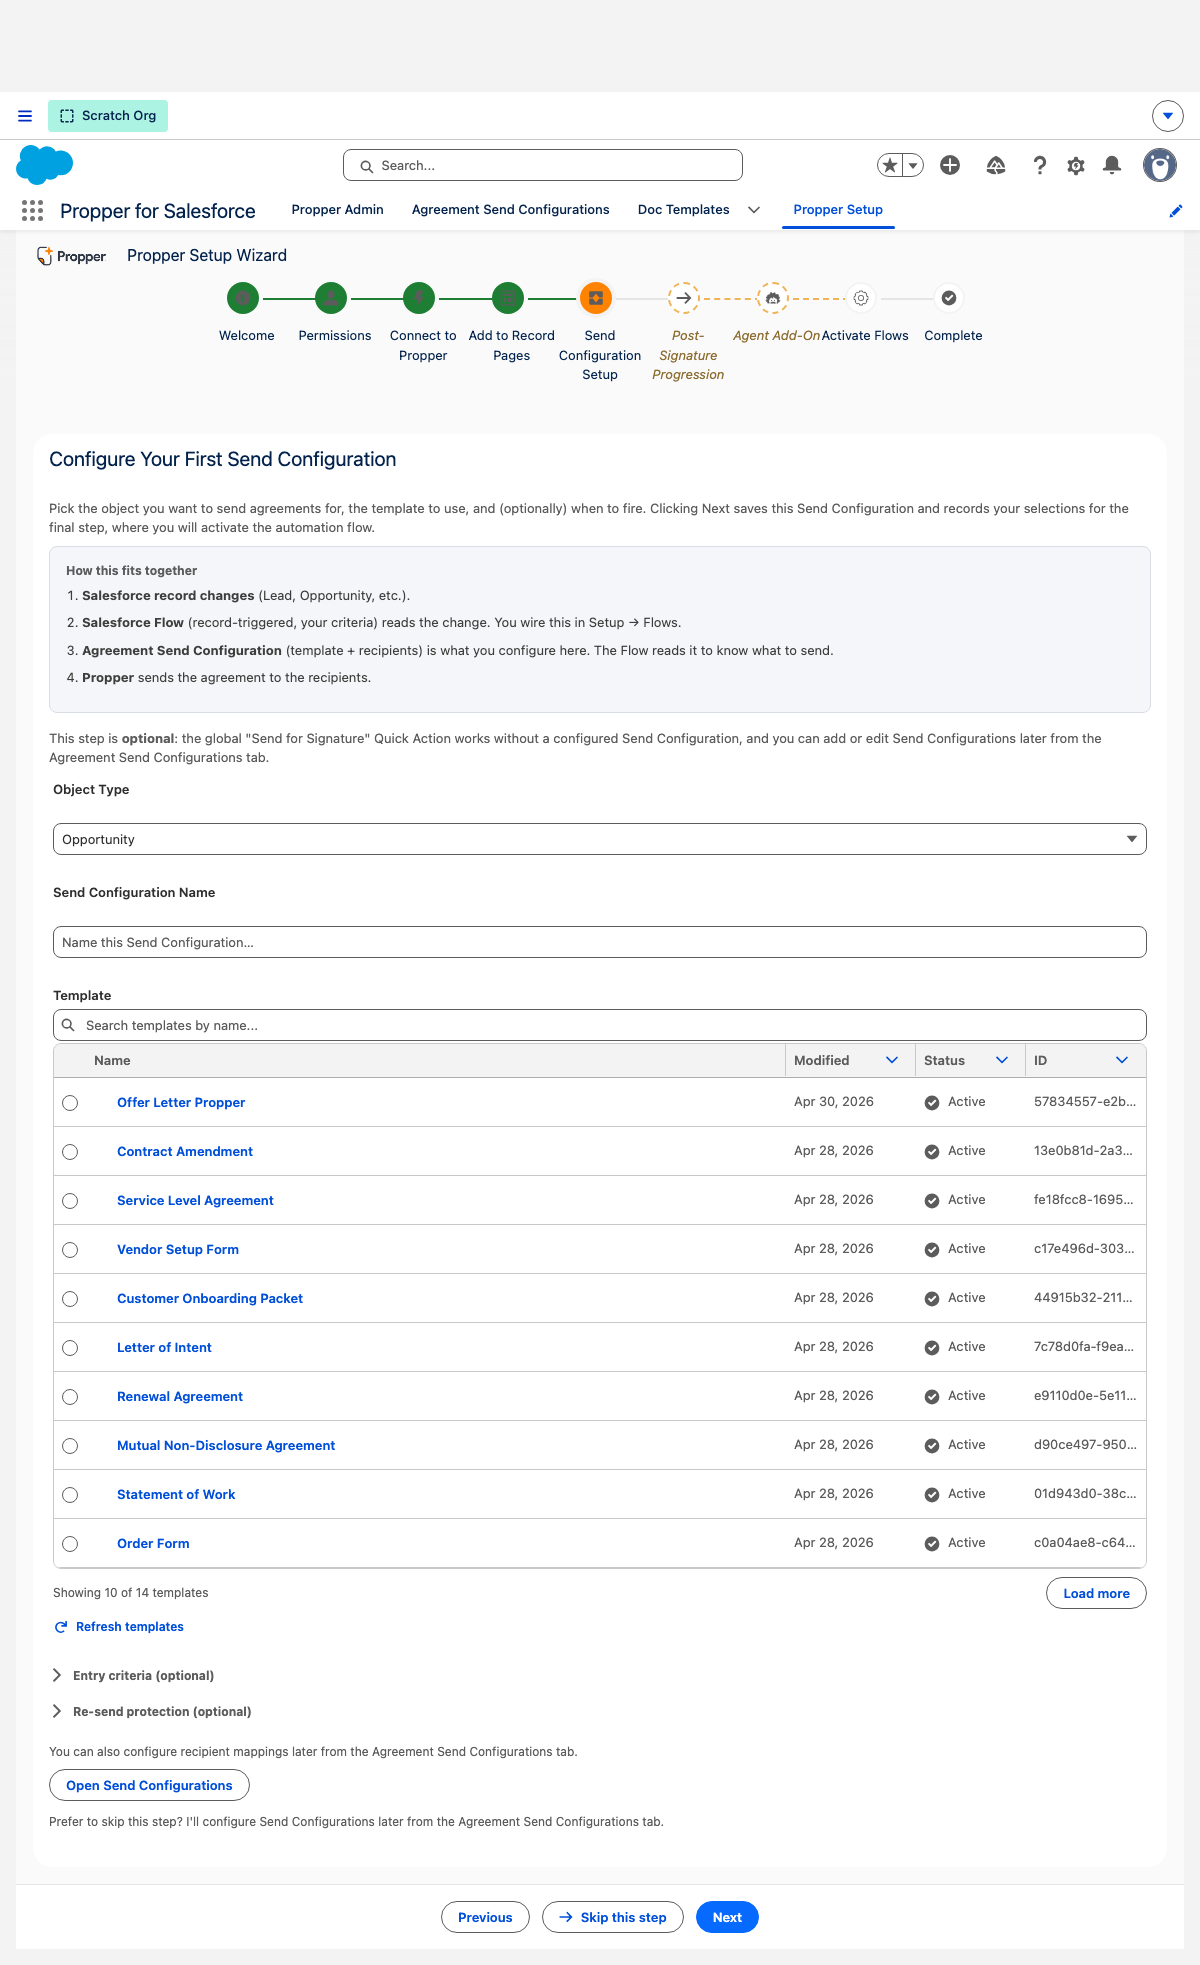
5. Send Configuration setup. Define what gets sent: the object, the template, and the recipients.
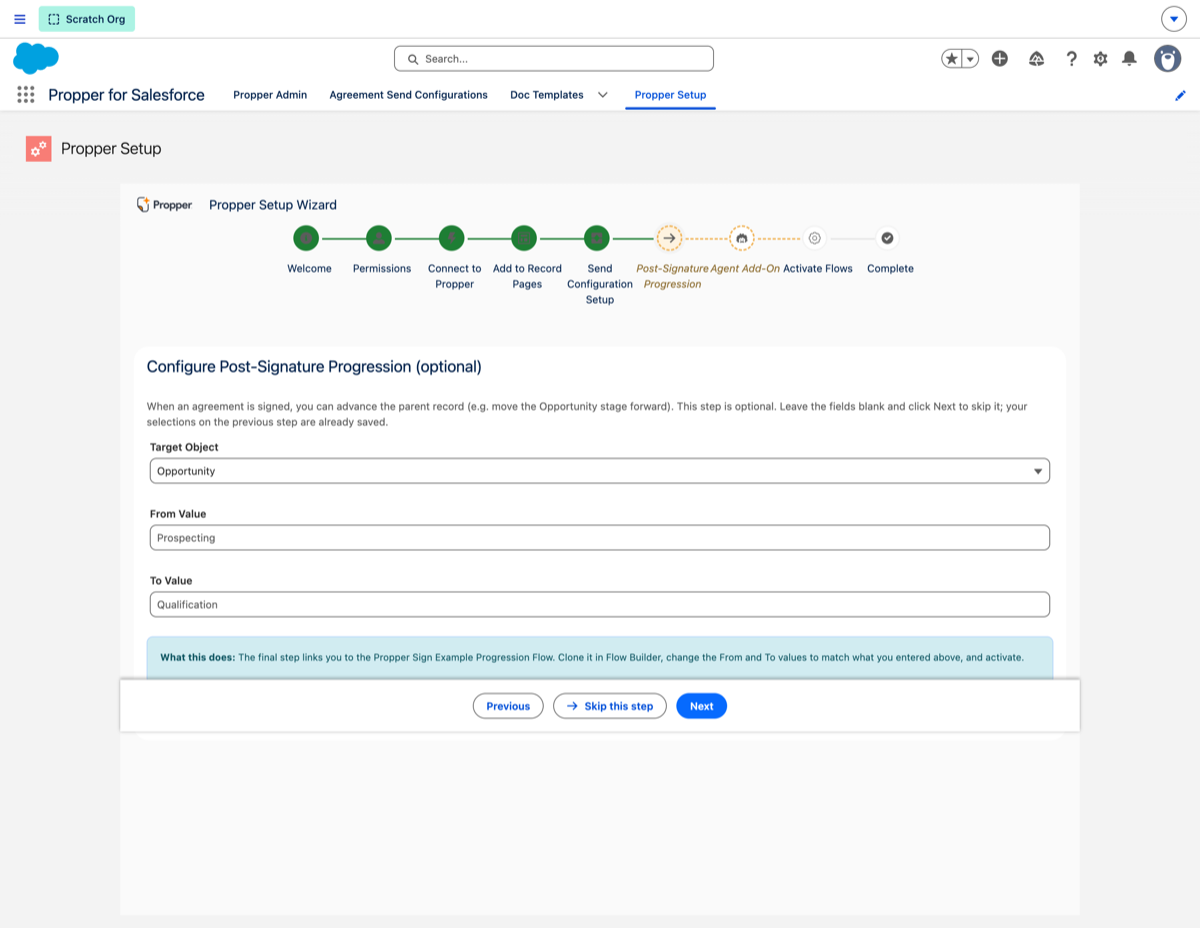
6. Post-signature progression. Optionally advance a record after signing.
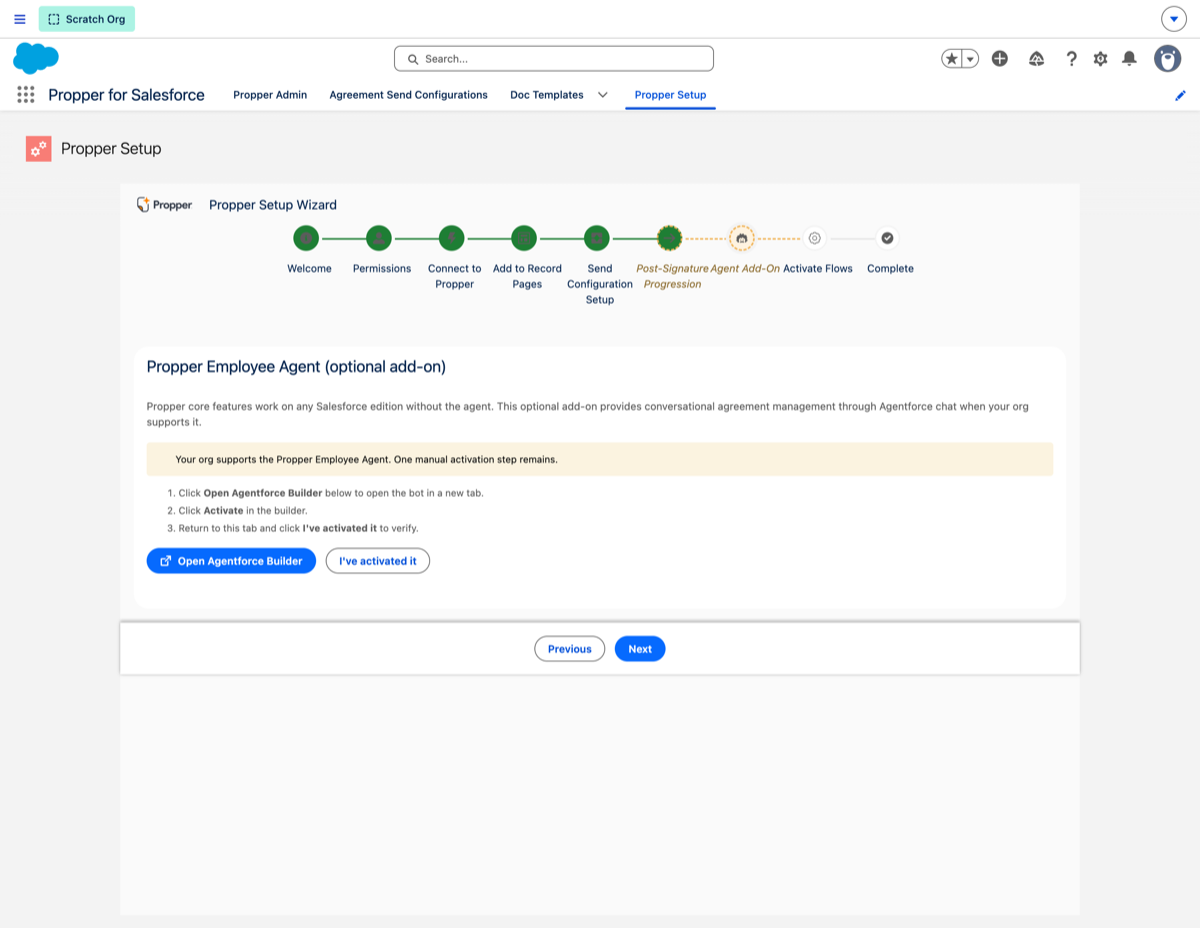
7. Agent add-on. Optionally enable the Salesforce Agentforce add-on.
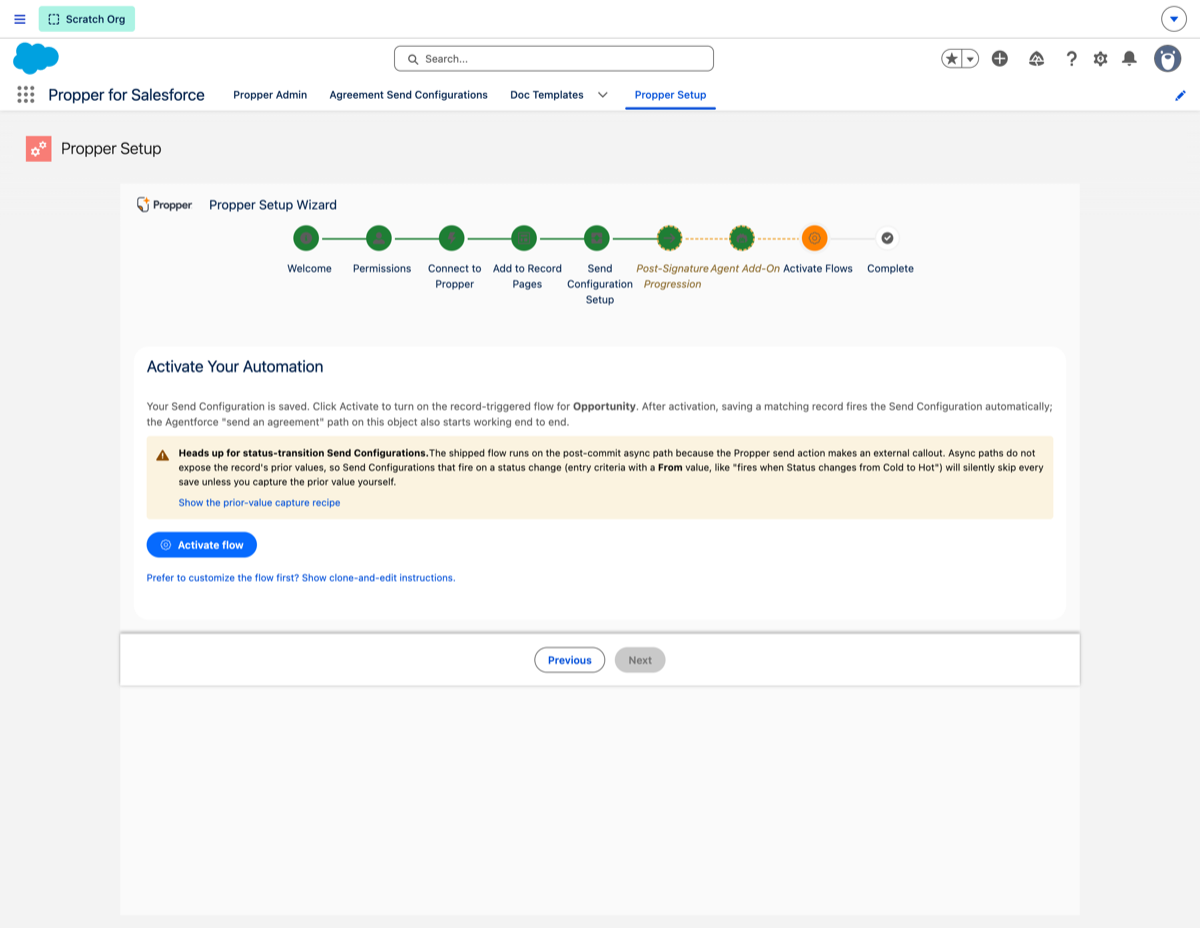
8. Activate flows. Turn on the automation that sends and updates agreements.
9. Complete. A per-step summary of what is configured and what still needs attention.
Permission sets
Propper for Salesforce ships three permission sets:
| Permission set | Grants |
|---|---|
Propper_Admin | Full administration of Propper in the org. |
Propper_User | Sending for signature and generating documents, for everyday users. |
Propper_Agent | Access for users who interact with the optional Agentforce agent. |
Assign permission sets from the wizard's Permissions step, or from Setup > Permission Sets.
Connect with OAuth
On the Connect to Propper step, click Connect and authorize. Propper establishes a secure, per-org connection for you. The connection runs within your org's own access model, and your credentials are never stored in queryable fields or written to logs.
Send Configurations
A Send Configuration ties an object to a template and its recipients, so the automation knows what to send. To create one:
- Open the Agreement Send Configurations tab, or use the wizard's Send Configuration setup step.
- Choose the object (for example, Opportunity), name the configuration, and select a template.
- Map recipients to people on the record, specific users, or literal email addresses.
- Optionally set entry criteria, and choose a delivery method: Send dispatches the agreement immediately, while Draft holds it for a sender to review and release.
A Send Configuration is Propper's own concept, and it is separate from a Salesforce record-triggered Flow.
Optional: the Agentforce add-on
If your org has Salesforce Agentforce, you can enable the optional Propper agent so users can send agreements and check status from a conversational agent. Core signing and generation work whether or not you enable it. Users who interact with the agent also need the Propper_Agent permission set.
Verify your setup
Send a test agreement from a record, confirm the recipient receives it, and check that the status updates on the record. For day-to-day usage, see the user guide.