Creating Templates
Building a template takes around 10–15 minutes the first time. After that, sending the same agreement is just a matter of filling in names.
Step 1: Start a New Template
- Go to Sign > Templates.
- Click Create Template.
- Give it a descriptive name, something that makes it easy to find later, like "Vendor NDA" or "New Hire Offer Letter".
- Add a short description (optional, but helpful for your team).

Step 2: Upload Your Document
Upload the PDF or document you want recipients to sign. Propper supports PDF, DOCX, and other common formats.
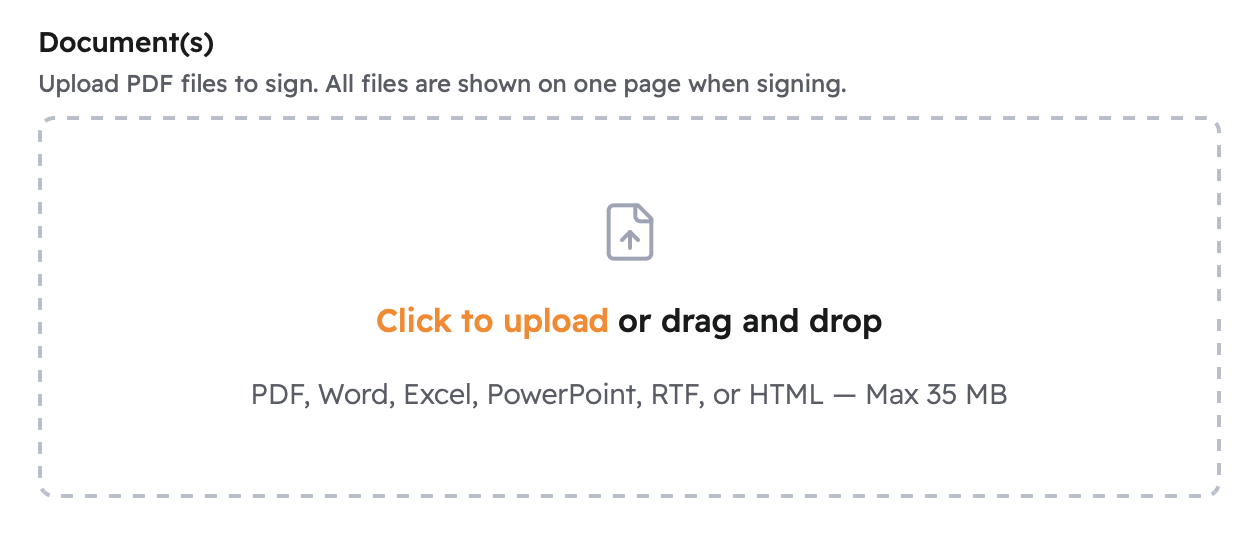
If you get an upload error:
- File too large, Compress the PDF or split it into multiple files.
- Invalid format, Check that the file isn't corrupted. Password-protected PDFs need to have protection removed before uploading.
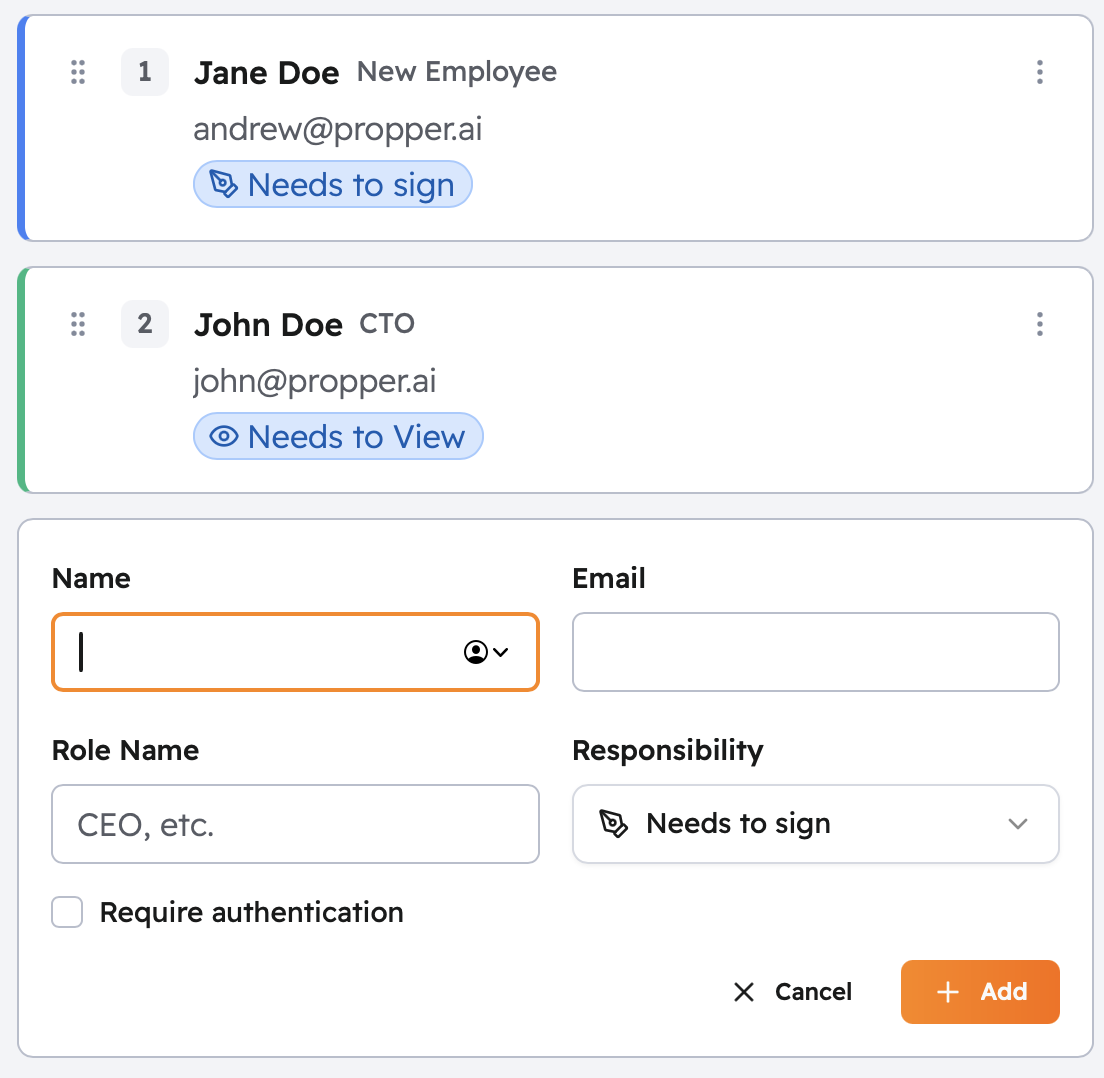
Step 3: Add Recipient Roles
Roles are placeholders for the real people you'll fill in when you send. You define who needs to act and in what order.
- Click Add Recipient.
- Enter a role name that describes the person's function, for example, "Hiring Manager" or "New Employee". Avoid generic names like "Signer 1".
- Choose the role type:
- Signer, must complete their assigned fields before the agreement can finalize.
- Receives a Copy, gets the completed document by email; no action needed from them.
- Set a routing order number to control when each person is invited:
- Different numbers (1, 2, 3) mean people sign one after another.
- The same number means people are invited at the same time.
- Repeat for everyone who needs to be involved.
→ See Recipient Roles for common workflow patterns and examples.
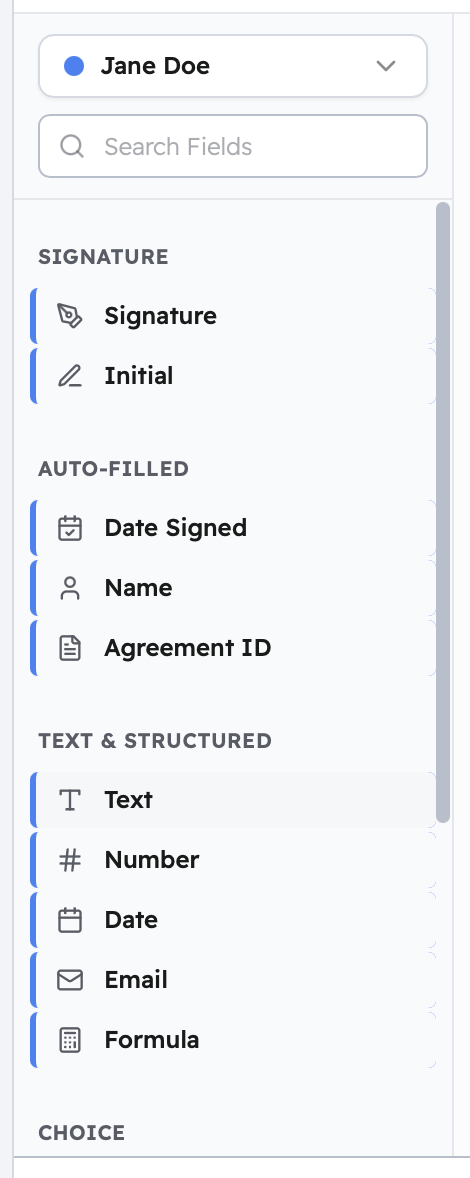
Step 4: Place Tags
Tags are the fields that recipients interact with, where they sign, type their name, check a box, and so on.
- Choose a tag type from the left panel.
- Drag it onto the document and drop it where you want it.
- With the tag selected, set Assigned To to the recipient role who should complete it.
- Mark it as required or optional.
- Repeat for every field you need.
Each recipient only sees and interacts with the tags assigned to their role.
→ See Tag Types for the full list of available tags and their options.
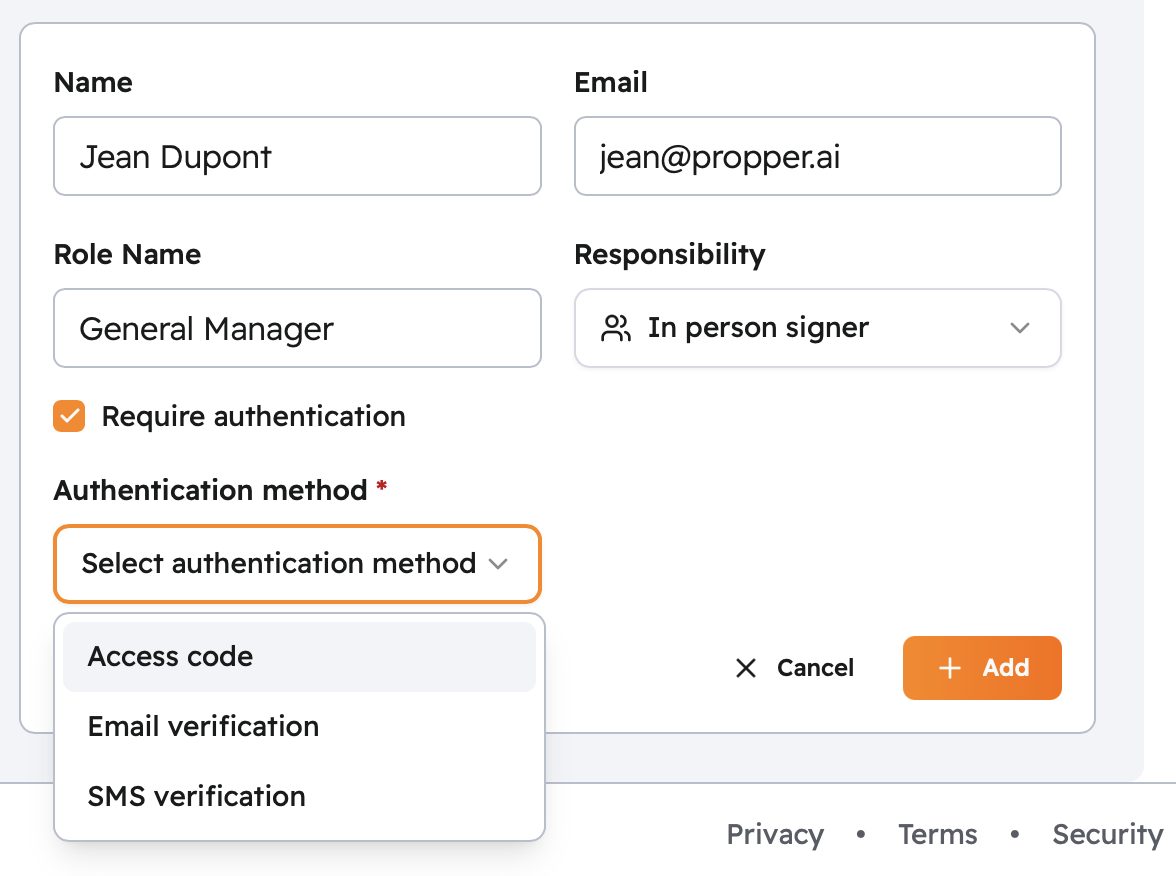
Step 5: Configure Settings (Optional)
Click Settings to adjust how recipients authenticate and what the invitation email says.
- Authentication, choose how each recipient verifies their identity (email code, SMS, access code, or identity provider). → See Identity Verification.
- Email message, customize the subject line and body of the invitation email recipients receive.
Step 6: Save and Test
- Review your tag placements across all pages.
- Click Save Template.
Before using the template with real recipients, send a test agreement to yourself:
- Open the template and click Use Template.
- Assign your own email address to every role.
- Complete the full signing flow as each recipient would.
- Check that the final document looks right and that the audit record was created.
This catches any placement issues or routing problems before they affect someone else.
Next Steps
- Recipient Roles: signing order patterns and workflow examples
- Tag Types: every available tag type and its configuration options
- Sending Agreements: how to send your template once it's ready